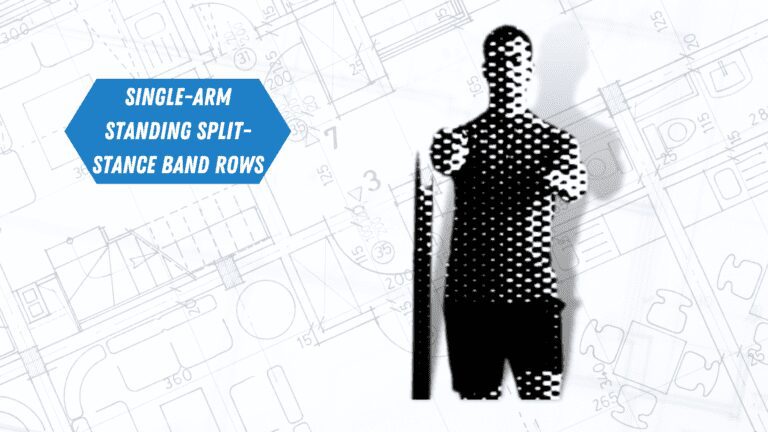
Single-Arm Band Rows build a thicker, stronger back and bulletproof your shoulder health for bigger lifts. This is the ultimate home-gym and warm-up weapon. It’s not a rehab exercise—it’s a performance hack that targets your lats, rear delts, and rhomboids with constant tension. This guide breaks down the form, programming, and how to make this simple move the secret to a wider V-taper and injury-proof shoulders.
Disclaimer: This guide is for performance and aesthetic enhancement. It is not medical advice. Consult a healthcare professional before beginning any new exercise program. You are responsible for your own safety and proper form.
Why Single-Arm Band Rows Are a Performance Multiplier
Single-Arm Band Rows correct muscle imbalances, build foundational back thickness, and enhance shoulder stability for bigger presses and pulls. Unlike barbell rows, the unilateral format and elastic resistance provide unique benefits that directly translate to a more powerful, resilient physique.
- Unilateral Strength & Imbalance Correction: Trains each side independently. Eliminates strength discrepancies that limit your Barbell Deadlift or Bent-Over Row.
- Constant Tension for Muscle Growth: Resistance bands provide maximal tension at the peak contraction—where it matters most for building thickness in the lats and rear delts.
- Scapular & Rotator Cuff Health: Promotes healthy, stable shoulder movement. The cornerstone of injury-proofing your Barbell Bench Press and Overhead Press.
- Portable & Scalable: The ultimate travel or home-gym tool. One band replaces a cable station. Increase tension by stepping forward or using a heavier band.
Perfect Form: The Step-by-Step Breakdown
Master the hip-hinge setup and controlled scapular retraction to maximize lat engagement and minimize momentum. This isn’t a full-body yank. It’s a precision movement for the back. For a full library of technique guides, visit our Back Exercises hub.
1. The Stance & Setup
Anchor the band at chest height. Assume an athletic split stance, hips hinged back, core braced. The band should be taut in the start position. Your torso should be roughly parallel to the floor. This stable base is critical—no swaying.
2. The Pull: Elbow & Scapula
Initiate the pull by driving your elbow back and down, squeezing your shoulder blade toward your spine. Think of pulling your elbow to your back pocket. Your torso should not rotate significantly. For complementary shoulder stability, pair with Banded Face Pulls.
3. The Peak Contraction & Eccentric
Hold the peak squeeze for 1-2 seconds, then slowly control the band back over 3-4 seconds. Fight the band’s pull on the way back. This eccentric phase is where serious muscle damage (and growth) occurs. For core integration, combine with Single-Arm Planks.
Programming & Progressive Overload
Program band rows for high reps as a warm-up, finisher, or standalone hypertrophy block. Progressive overload is achieved through increased tension, time under tension, or volume. For complete program design, see our Muscle Building hub.
1. As a Warm-Up (Pre-Workout)
- Goal: Activate lats and rear delts, lubricate shoulder joints.
- Protocol: 2-3 sets of 15-20 reps per arm with light-moderate band tension.
- Pair With: Band Pull-Aparts and Dead Bugs for a full pre-lift circuit.
2. As a Hypertrophy Finisher
- Goal: Maximize pump and metabolic stress in the back muscles.
- Protocol: 3-4 sets of 12-15 reps per arm with moderate-heavy band. Rest 60 sec.
- Advanced Technique: Use a 2-second pause at peak contraction.
3. As a Standalone Strength/Hypertrophy Block
- Goal: Build pure back strength and muscle when equipment is limited.
- Protocol: 4 sets of 8-10 reps per arm with maximal band tension. Treat it like a main lift.
- Progression: When you hit the top of your rep range, move to a thicker band or slow the tempo.
“The single-arm band row is a diagnostic tool. If you can’t control the scapula or feel your lats firing, you have a motor control leak that will cap your heavy compound lifts. Fix it here, with light tension and high focus, before it manifests as a shoulder impingement or a deadlift plateau.”
— Eugene Thong, CSCS
Workout Integration & Common Mistakes
Slot band rows strategically within your training week to complement, not compete with, your heavy pulls. Intelligent placement prevents overtraining and maximizes recovery. For a holistic approach, explore our Recovery Protocols.
Sample Full-Body Integration (Home Gym)
- A1. Goblet Squat: 4×8
- B1. Single-Arm Band Row: 3×12/arm
- B2. Band-Assisted Pushup: 3xAMRAP
- C1. Farmer’s Carry: 3x40m
Common Form Mistakes to Eliminate
- Mistake 1: Using Momentum. Fix: Slow down. Eliminate torso swing. If you can’t, reduce band tension.
- Mistake 2: Shrugging the Shoulder. Fix: Initiate with the elbow, not the trap. Keep the working shoulder depressed.
- Mistake 3: Poor Hip Hinge. Fix: Set your spine neutral and hinge at the hips. If needed, practice the Romanian Deadlift pattern.
- Mistake 4: Neglecting the Scapula. Fix: Consciously retract and squeeze the shoulder blade at the top of every rep.
The Bottom Line: Your Back’s Secret Weapon
The Single-Arm Band Row is a low-tech, high-impact tool for building a thicker, stronger, more resilient back. Use it to warm up, to burn out, or to build. Master the form, apply progressive overload, and watch your posture and pulling strength transform.
Single-Arm Band Row FAQ
What band resistance should I start with?
Start with a light band that allows 15-20 perfect reps. Master the movement pattern before adding tension. A set of varying resistance bands is the most versatile home gym purchase you can make.
How does this compare to a Dumbbell Row?
Band rows offer constant tension and peak contraction; dumbbell rows allow heavier loading. They’re complementary. Use bands for higher-rep hypertrophy and shoulder health, dumbbells for pure strength. For a full comparison, see our Dumbbell Exercise hub.
Can I build a big back with just bands?
Yes, with progressive overload and high volume. However, for maximum size, bands are best combined with heavy compound lifts like Chin-Ups and deadlifts.
Where should I feel it?
Primary: Mid-back (rhomboids), rear delts, and lats. If you feel it in your biceps or traps, reduce the weight and focus on driving with your elbow.