Building a home gym and not sure whether it will actually fit? The numbers that matter are simple: a power rack with a loaded bar needs 8 by 8 feet, a cardio corner needs 4 by 6, and more home gyms fail on ceiling height and electrical circuits than on floor space. Measure those two before you spend a dollar.
For Educational Purposes Only: The information provided is for informational and educational use. It is not intended as medical advice or a substitute for professional consultation. Always consult a qualified professional before beginning any new training or nutrition program. Results vary by individual. Price Disclaimer: Prices shown are approximate and may vary. Check current pricing and availability on Amazon.
How Much Space a Home Gym Actually Needs
Every home gym question starts with a tape measure, not a shopping cart. Equipment footprints are published, but the footprint is never the number that matters. Working space is. A rack does not need 4 feet of floor. It needs 4 feet of floor plus a 7 foot bar plus the room to load plates on both ends plus the room for you to walk around it without turning sideways.
- Power rack with a loaded bar:
- 8 by 8 feet minimum, 8 by 10 comfortable. A 4 post rack is about 48 inches deep, and the bar is roughly 7 feet long, so the width is set by the bar, not the steel.
- Bench and dumbbell area:
- 6 by 6 feet. A bench is about 4 by 2 feet, and you need floor on both sides for dumbbells and for getting up.
- Walking pad or under desk treadmill:
- 5 by 3 feet in use, 2 by 2 stored vertically. Add 6 inches behind it so the belt is not against a wall.
- Full treadmill:
- 7 by 4 feet. They are longer than people expect, and the deck needs clearance to fold.
- Rowing machine:
- 9 by 3 feet in use, 2 by 2 stored upright. This is the most space efficient cardio machine you can own.
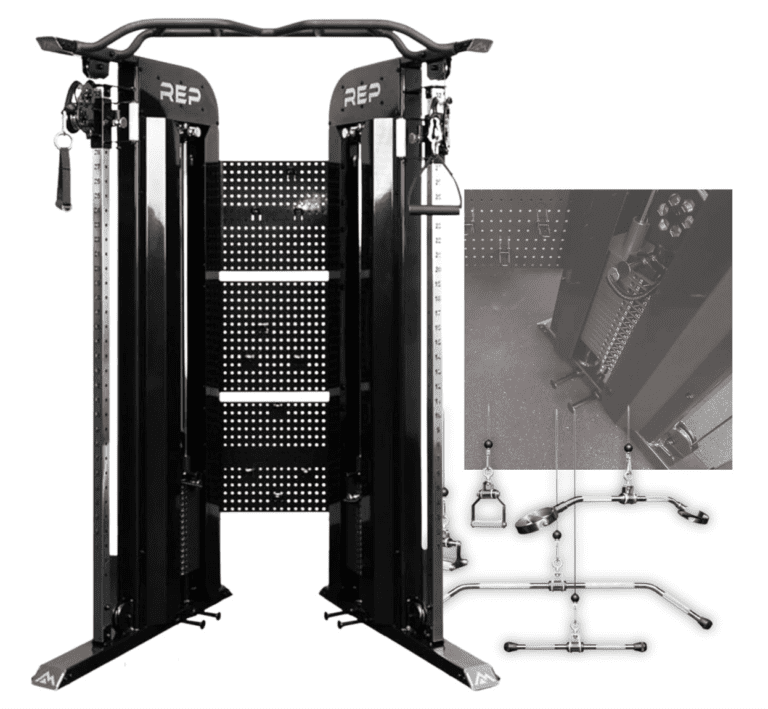
- Cable machine or functional trainer:
- 7 by 5 feet. Dual pulleys need room to walk between them, which is the whole point of owning one.
Walkways need 36 inches. Anything narrower and you will stop using that part of the room, because carrying a plate through an 18 inch gap is a chore you will avoid. Measure the walkway before you measure the rack.
Ceiling Height: The Number That Kills More Plans Than Anything
Floor space is negotiable. Ceiling height is not. You can rearrange a room. You cannot raise a joist, and you cannot press a barbell through a duct.
- 8 feet (96 inches): The standard ceiling. Covers every rack, bench, and seated movement. Standing overhead press is out, unless you are very short or you press from a kneeling position.
- 9 feet and up: Press overhead with room to spare, and use a full height rack with a pull-up bar without folding your legs.
- 7 feet and under: Basements and older homes. A squat stand replaces a full rack, and you press outside or seated.
Measure the Low Points, Not the Ceiling
Stand under the middle of the room and look up. The obstacles above your head decide what you can do:
- Garage door tracks and openers hang 12 to 18 inches below the ceiling, and they usually run right down the middle of the room.
- Ductwork and soffits in basements and finished garages steal a foot in one corner.
- Light fixtures and ceiling fans remove clearance exactly where you want to stand.
The calculation that matters: your standing reach, plus the diameter of the largest plate on the bar, plus 6 inches of insurance. A 6 foot tall lifter reaches about 7 feet 6 inches with arms overhead, and a 45 lb plate is 17.7 inches across, which puts a standing press north of 8 feet 6 inches before you add margin. That is why 9 feet is the honest target for pressing indoors.
If your ceiling rules out a full rack, a squat stand with safety arms is the practical substitute. A shorter cage is the other option, and both are better than owning a rack you cannot use.
Home Gym Layout: Zones, Traffic, and Swing Radius
Good layouts are organized by movement, not by category. Grouping all the heavy things on one wall feels tidy and trains terribly, because you end up carrying dumbbells across the room between every superset.
Three Zones, In This Order
- The loading zone: rack or dumbbell rack, closest to the door and to the plates. This is where the weight travels the shortest distance.
- The floor zone: the open middle. Mat work, carries, and anything that needs swing radius.
- The output zone: cardio against the far wall, because it is the least interactive station and the one you visit last.
Swing Radius and the Mirror Question
Mirrors do two jobs and only one of them is vanity. They let you check form without turning your head, and they make a small room feel twice its size. Mount them on the wall opposite the rack, not behind it, so you can see your own bar path.
Keep 3 feet of clearance in front of any mirror. A mirror you can hit with a kettlebell is a $200 problem.
The last layout rule: leave one wall completely empty. Something will need to go there, whether it is a bike you buy in March or a bench you fold out. A room with no free wall is a room that is already full. When you do start using the walls, our home gym storage guide covers what holds what.
Before You Buy: Floor Joists, Dead Load, and the Slab
Your floor is rated for people standing still, not for a rack and 400 lbs of iron. Most residential floors are designed for roughly 30 to 40 pounds per square foot of live load. A loaded rack concentrates several times that into a few square feet. Nothing in a home gym is heavier per square foot than a rack full of plates.
- Find the joists and note their direction. A stud finder and a look in the basement tell you. Running a rack across multiple joists spreads the load better than sitting on one.
- Keep heavy equipment near load bearing walls rather than the middle of a span, because the middle flexes most.
- Spread it with plywood. Two sheets of 3/4 inch plywood under a rack distributes load across joists for about $80.
- A concrete slab on grade is the ideal gym floor for load, and the worst for moisture. That is a flooring problem, and our home gym flooring guide covers what to put on it.
Do not drop weights on a wood framed floor. Not because the floor will fail immediately, but because a 300 lb barbell dropped from overhead puts a shock load into the structure that a static 300 lbs never does. If you plan to drop from overhead, you need a slab, a platform, or a different hobby.
For anything above a few hundred pounds in one spot, especially on an upper floor, pay a structural professional for one visit. That is the cheapest insurance in the entire build.
Power, Outlets, and Lighting
The electrical plan is the part everyone skips and nobody can fix later. Adding a circuit after the drywall is up costs three times what it costs during the build.
Circuits
- Count the amps. A treadmill can pull 10 to 15 amps under load, which is most of a 15 amp circuit by itself. Two motorized machines on one circuit is how you meet your breaker panel.
- A dedicated 20 amp circuit is the safe answer for a cardio machine. Garages and basements usually require GFCI protection by code.
- Put outlets at 48 inches, not 12. Standard height is behind every rack and machine you will ever own. Four feet is above the equipment and below the ceiling.
- Add one outlet on each wall. Moving a treadmill from one wall to another should not require an extension cord across the room.
Lighting
- Target 30 to 50 lumens per square foot for a training space. A 200 square foot garage gym wants 6,000 to 10,000 lumens, which is roughly four to six 4 foot LED shop lights.
- Put light on the working wall, not the ceiling center. Light behind you throws your own shadow onto the mirror and the platform.
- Avoid any fixture you can hit with a bar. Ceiling fans and a standing press are natural enemies.
None of this is a weekend project if it involves new circuits. Hire an electrician, get it permitted, and put the outlets where the equipment will actually live, not where the wall is convenient today.
Building It in Order: The Six Step Sequence
Build in the order that removes friction fastest. Most people buy the rack first because it looks like a gym, and then train in a room with no floor, no lighting, and one circuit. Sequence beats budget.
- Measure the room, the ceiling, the doors, and the joists. Cost: free. Write the numbers down and take them shopping.
- Fix the floor. Rubber where the weight lands, foam where you sit, and an isolation pad under anything with a motor. See the flooring guide for materials and thickness.
- Fix the light and the power. Shop lights and enough outlets on the right walls.
- Buy the loadable basics. Adjustable dumbbells, a folding bench, and a mat. This is the $250 tier in our home gym on a budget guide.
- Add cardio when the habit sticks. A walking pad or a rower, and put it in the output zone.
- Add the rack when you outgrow the dumbbells. Buy it used if you can find one, which is the whole argument in our used home gym equipment guide.
Anyone who buys step 6 before step 2 owns a rack and a reason not to use it.
Room by Room: Garage, Basement, Spare Room, and Living Room
Every room has one defining constraint. Know yours before you design around it.
The Garage Gym
The garage is the best room in the house for a gym and the easiest place to build a bad one. Slab on grade means load is a non issue. The constraints are temperature, moisture, and that door track running down the middle of the ceiling.
- Plan around the door track. It is usually at 7 feet and it is usually exactly where you want to press.
- Condensation rusts plates. Uninsulated garages swing in temperature, and bare iron sweats. Keep plates off the concrete and consider a dehumidifier. The full routine is in our home gym maintenance guide.
- Cold kills consistency. A 40 degree garage in January is a motivation tax. Insulation and a heater are cheaper than a gym membership you will not use either.
The Basement Gym
Basements are quiet, temperature stable, and usually 7 feet tall. The two problems are headroom and moisture, and both are measurable before you buy.
- Find the lowest soffit and duct. That number, not the ceiling, is your real height.
- Dehumidify. Basements hold moisture, and moisture plus iron equals rust. Run a dehumidifier set to 50 percent relative humidity.
- Check egress and ventilation. A finished basement gym needs airflow, not just a window.
The Spare Room Gym
Spare rooms have the best light, the worst floors, and a door that is 30 inches wide. Everything you buy has to fit through that door, which rules out a 4 by 6 foot stall mat carried in one piece.
- Floor joists are the constraint. Plywood under the rack, weight near the wall, and no dropped barbells.
- Noise travels downstairs. The flooring guide covers the decoupling that actually works.
- Buy folding and stacking equipment. A folding bench and vertical storage turn 80 square feet into a usable room.
The Living Room Gym
The living room is a negotiation, and it is won with storage rather than with equipment. If everything has a home, the room reads as a living room. If anything is left out, it reads as a mess and the equipment loses the vote.
- Dumbbells, bands, a mat, and a jump rope cover more training than most people expect, and all of it fits in a closet.
- Foldable everything. Bench, walking pad, and rack if you must.
- See our best home gym for apartments guide for the equipment that survives shared space without dominating it.
How to Build a Home Gym: The Raw Truth
A: 8 by 8 feet holds a rack with a loaded bar, and 8 by 10 is where it stops feeling cramped. A cardio and dumbbell corner fits in 4 by 6 feet. Walkways need 36 inches. Working space is the number that matters, not equipment footprint.
A: 8 feet covers racks, benches, and everything seated or lying. 9 feet is the target if you press standing, because your reach plus a 17.7 inch plate plus margin clears 8 feet 6 inches. Measure under the door track, ducts, and light fixtures, not at the highest point.
A: Usually yes. Spread load with plywood across joists, keep heavy equipment near load bearing walls, and never drop weights on a wood framed floor. Above a few hundred pounds in one spot, pay a structural professional for one visit.
A: For anything with a motor, yes. A treadmill can pull 10 to 15 amps under load, which is most of a 15 amp circuit. A dedicated 20 amp circuit is the safe answer, and garages and basements need GFCI protection. Two motorized machines on one circuit is a tripped breaker mid workout.
A: About $250 for a complete starter setup, roughly $1,000 for the configuration most people want, and $2,000 to $2,600 for a full garage gym. Flooring adds $50 to $400. See the four budget tiers for what each number buys.
A: Measure first, then floor, then loadable basics. Adjustable dumbbells, a folding bench, and a mat come before any machine. Add cardio when the habit sticks and a rack when you outgrow the dumbbells. Anyone who buys the rack first owns a rack and a reason not to use it.
Final Verdict: Measure Twice, Buy Once
A home gym is a construction project that people treat as a shopping list. The room decides what you can own, and the ceiling decides what you can do. Get those two answers before you open a single listing.
The 8 by 10 spare room build above scores 4.7 out of 5 under The Body Blueprint Technical Scoring Rubric, because every piece folds or stacks and the layout leaves a free wall. It loses points on adjustability and range, since an 8 foot ceiling rules out standing overhead press.
Build it if: You measured the ceiling, found the joists, and have 36 inch walkways.
Do not build it if: You are designing around equipment you have not bought yet. The room is the constraint. Everything else is adjustable.
For the equipment that fills the room, see our home workout equipment reviews.
The Bottom Line: The Room Wins Every Argument.
Ceiling height, joist direction, and one free wall decide more about your training than any brand on the market. Measure the room, fix the floor, light it properly, and then buy the equipment that fits.
The Build Lexicon
- Footprint
- The floor area a piece of equipment occupies when it is sitting still. The least useful number in gym planning, because it ignores the bar, the plates, and you.
- Clearance
- The space an equipment needs to be used, loaded, and walked around. Usually double the footprint, and always the number that decides whether a room works.
- Swing Radius
- The arc your body or a kettlebell travels through during a movement. It is why an empty middle beats a tidy perimeter.
- Live Load
- The weight a floor is designed to carry while in use, typically 30 to 40 pounds per square foot in a home. People, furniture, and you.
- Dead Load
- The static weight of equipment and structure. A loaded rack puts 600 to 800 lbs into a few square feet, well past the live load rating for that area.
- Joist Span
- The distance a floor joist covers between supports. The middle of a long span flexes most, which is why heavy equipment belongs near a load bearing wall.
- Slab on Grade
- A concrete floor poured directly on the ground, common in garages. Ideal for load, and a moisture source that rusts iron.
- Dedicated Circuit
- An electrical circuit serving one machine and nothing else. The answer to a treadmill that trips the breaker every time the fridge kicks on.
- GFCI
- A ground fault circuit interrupter, required by code in garages, basements, and near water. It cuts power when current takes an unintended path, which is what protects you.
- Lumens
- The total light output of a fixture. A training space wants 30 to 50 lumens per square foot, which is roughly three times a living room.