The Speediance Setup & Installation process is simple — if you know what actually matters.
Most people overcomplicate it and end up with bad placement, weak Wi‑Fi, or a cramped training zone.
This guide shows you the setup that delivers real performance — and the mistakes that ruin it.
Disclaimer: You’re here to find a product that’ll get you results, and I’m here to help. Just a heads-up: As an Amazon Associate, I earn from qualifying purchases. If you buy through my links, I get a small commission at no added cost to you. It’s like I get a little something for doing the heavy lifting on research. Fair deal? Now, let’s get into the good stuff.
Still deciding where Speediance fits in your home? The 2026 Buyer’s Guide breaks down space, resistance, and training style.
Space & Layout (Essential)
Speediance doesn’t need much room — but the *right* room makes a huge difference. Bad placement kills range of motion and ruins your training flow.
- Minimum footprint: 4 ft × 6 ft of clear space.
- Ideal ceiling height: 7 ft 6 in or higher.
- Side clearance: At least 18 inches per side for handles and bar work.
- Avoid: Corners that block cable travel or limit step‑outs.
“Cable machines need space to breathe. Give yourself room to move, and every exercise feels better instantly.”
— Eugene Thong, CSCS
Flooring & Stability (Essential)
Speediance works on almost any surface — but some surfaces make training smoother, safer, and quieter.
- Best: Rubber gym flooring or dense foam tiles.
- Good: Carpet or hardwood with a protective mat.
- Avoid: Uneven floors that cause wobble or tilt.
- Pro tip: A 4×6 mat reduces vibration and protects your floor.
“Stability is everything. When the base is solid, your reps become cleaner and your strength output improves.”
— Charles Damiano, B.S. Clinical Nutrition
Wi‑Fi & Connectivity (Essential)
Speediance needs a strong signal — not perfect, just consistent. Weak Wi‑Fi causes lag, failed updates, and mode switching delays.
- Minimum: 20 Mbps download.
- Ideal: 50+ Mbps with low interference.
- Best fix: Put a mesh node or extender in the room.
- Avoid: Basements with concrete walls and no router nearby.
“Smart gyms are only as smart as their connection. Fix the Wi‑Fi and everything runs smoother.”
— Eugene Thong, CSCS
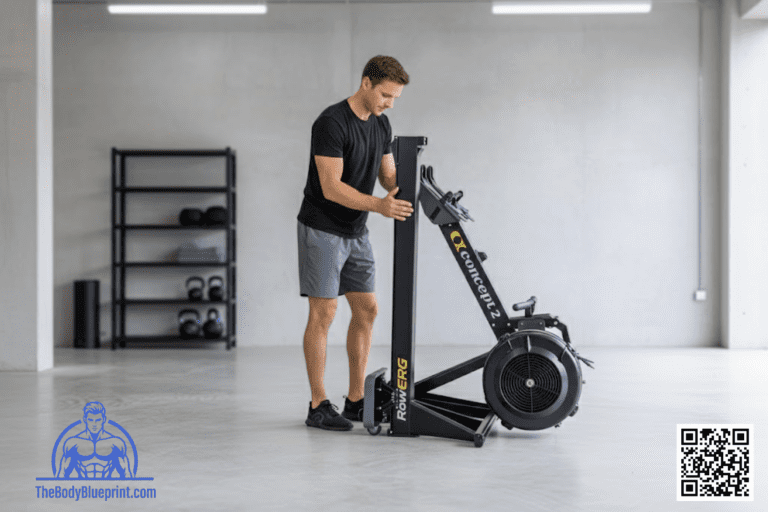
Assembly & Mounting (Simple)
Speediance arrives mostly assembled. The rest is quick — unless you ignore the basics.
- Unbox carefully: The frame is heavy; cut the box away instead of lifting.
- Two‑person move: Don’t drag it; tilt and walk it into place.
- Level the base: Use the adjustable feet to eliminate wobble.
- Wall clearance: Leave 4–6 inches behind the unit for airflow.
“Most setup issues come from rushing the placement. Take five extra minutes and you’ll save yourself hours later.”
— Charles Damiano, B.S. Clinical Nutrition
Calibration & First Use (Essential)
Your first session sets the tone. A clean calibration makes every rep smoother and every mode more accurate.
- Run the built‑in calibration: Takes 60 seconds, worth every one.
- Test cable travel: Pull each side fully to ensure no snagging.
- Set your starting weight: Begin lighter than you think — digital weight hits harder.
- Try each mode: Standard, Eccentric, Chains, Constant, Spotter.
“Digital weight feels different. Give yourself a few sessions to learn the tension curve — then watch your strength jump.”
— Eugene Thong, CSCS
Related Speediance Guides
- Speediance Buyer’s Guide (2026 Pillar)
- Accessories & Attachments Guide
- Training Modes & Workout Guide
- Speediance vs Tonal vs Vitruvian
The Iron Lexicon: Setup Edition
- Calibration
- The process that aligns Speediance’s sensors and cables for accurate resistance.
- Footprint
- The total space required for safe, unrestricted movement.
- Mesh Network
- A Wi‑Fi system that improves coverage across multiple rooms.
- Leveling Feet
- Adjustable supports that stabilize the machine on uneven floors.
- Cable Travel
- The full range the cables can extend without friction or obstruction.
Final Takeaway
Setting up Speediance the right way makes every workout smoother, safer, and more effective. Give the machine good placement, stable flooring, strong Wi‑Fi, and a clean calibration, and you’ll get the performance it was built for.