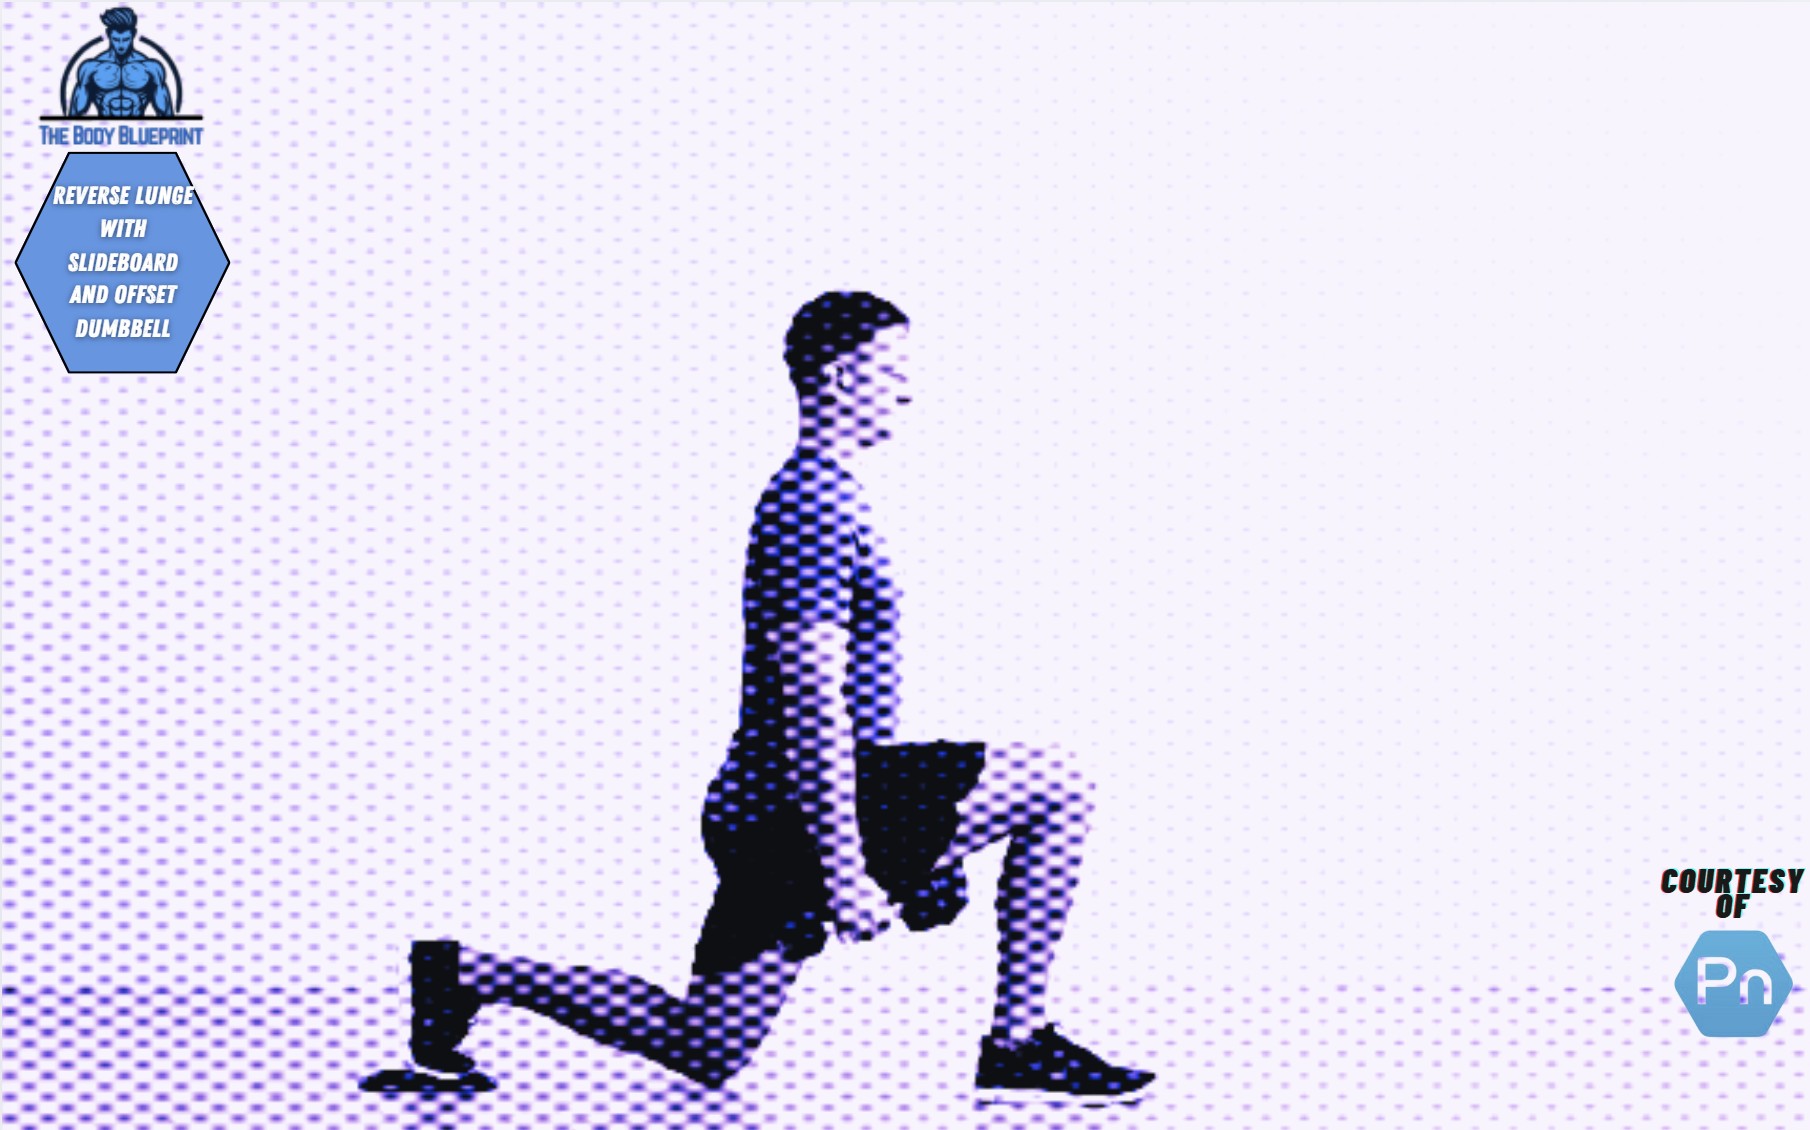
Picture this: you’re standing tall, ready to descend into a move that screams strength and balance. The slideboard glides beneath you, while an offset dumbbell challenges your core to fight gravity’s pull. It’s not just a lunge—it’s a test of willpower and control. Let’s break it down so you can own this move and maximize your gains.
Why the Reverse Lunge with Slideboard Deserves a Spot in Your Routine
Reverse lunges alone are a game-changer, but when you throw in a slideboard and an offset dumbbell, it becomes next-level functional training. Why?
- Improves balance and coordination: The slideboard forces stability, challenging your proprioception (fancy word for body awareness).
- Strengthens your posterior chain: Glutes, hamstrings, and calves fire up for every controlled rep.
- Core domination: The offset dumbbell forces anti-rotational work, turning your abs into steel.
- Low impact, high reward: Perfect for anyone avoiding joint strain while still chasing strength.
Performing the Reverse Lunge with Slideboard and Offset Dumbbell
Let’s get tactical—no fluff, just execution.
- Set up your space: Place a slideboard on a flat surface and grab a dumbbell (moderate weight).
- Grip it right: Hold the dumbbell in one hand at shoulder height in a front-rack position.
- Starting position: Stand on the slideboard with your front foot, ensuring your hips stay square.
- Engage your core: Brace your abs and maintain a neutral spine.
- Slide back and lower: With control, slide your back foot along the board, lowering into a lunge until your front thigh is parallel to the ground.
- Drive up: Press through your front heel, sliding the back foot forward to return to standing.
- Switch sides: Perform equal reps on each leg for balanced strength.
Pro Tip: Keep the movement slow and steady. This isn’t about speed—it’s about precision.
Benefits of Adding the Slideboard to Reverse Lunges
The slideboard isn’t just a gimmick—it’s a game-changer. Here’s why:
| Benefit | What It Does |
|---|---|
| Enhanced Stability | Forces you to maintain balance as your back foot slides. |
| Joint-Friendly Movement | Reduces knee strain while still delivering a deep stretch and burn. |
| Functional Core Activation | Challenges your core to stabilize throughout the sliding motion. |
| Muscle Engagement | Activates the glutes, quads, and hamstrings with precision. |
The Offset Dumbbell: Your Secret Weapon
Offset loading means holding the weight on one side of your body, and it’s not just for show. It’s a sneaky way to:
- Build unilateral strength: Balances out imbalances between your left and right sides.
- Increase core demand: Forces anti-rotation to prevent your torso from tipping.
- Enhance grip strength: That one-sided load puts your grip muscles to work.
Common Mistakes to Avoid
Even the best moves can go south if done wrong. Steer clear of these pitfalls:
- Rushing the movement: This is all about control. Slow down.
- Letting your knees cave in: Keep your front knee tracking over your toes.
- Leaning forward: Engage your core to stay upright.
- Not sliding far enough back: Aim for depth to engage your glutes fully.
Programming the Reverse Lunge with Slideboard
Where does this fit in your workout? Try these:
- Strength Day:
- 4 sets of 8-10 reps per leg, focusing on heavy offset dumbbells.
- Conditioning Finisher:
- 3 rounds of 10 reps per leg, minimal rest for a sweat-dripping burn.
Reverse Lunge Variations to Try
Mix it up with these tweaks:
- No Slideboard: Use your back foot on the floor if you’re just starting out.
- Double Offset Dumbbells: Hold a dumbbell in each hand for an extra challenge.
- Bulgarian Style: Elevate your back foot for a deeper stretch.
FAQ: Your Burning Questions Answered
Q: Is the slideboard necessary?
A: Not mandatory but highly recommended for added stability and balance challenges.
Q: What weight should I start with?
A: Start light (10-20 lbs) to nail your form before leveling up.
Q: Can I do this without equipment?
A: Sure! A towel on a hardwood floor mimics the slideboard, and a water bottle can stand in for a dumbbell.
Recap: Make It Count
The reverse lunge with a slideboard and offset dumbbell isn’t just another move—it’s an experience. You’re not just building strength; you’re honing balance, core stability, and control. Own it, and your body will thank you.

