Latissimus dorsi, rhomboids, and posterior deltoid get hammered by the inverted row with feet elevated. The elevated feet position increases the moment arm on your back. Your core works overtime to maintain a rigid plank. This isn’t a beginner pull-up. This is a horizontal pulling exercise that builds scapular retraction strength and improves postural alignment.
Inverted Row With Feet Elevated – Execution Protocol

“The inverted row with feet elevated is like pulling yourself up from a cliff edge. Your feet are elevated. Your body is horizontal. Every rep is earned. Your back muscles have no choice but to fire.”
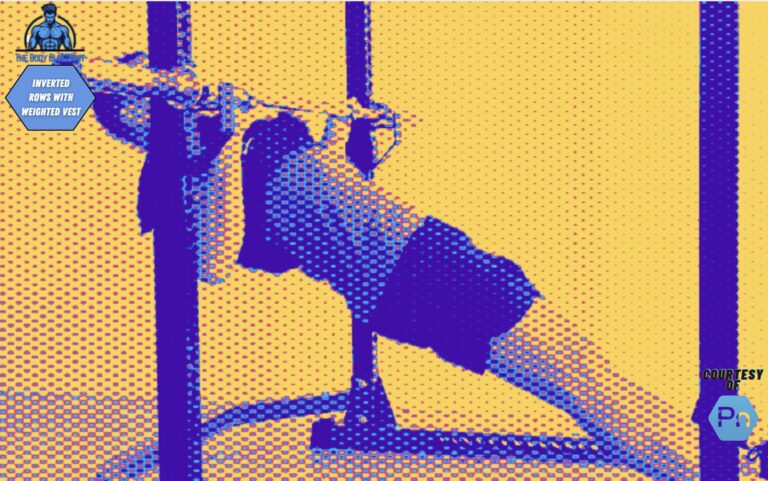
Set up a bar at waist height and position your feet on an elevated surface. Use a squat rack, Smith machine, or sturdy table. Your feet rest on a bench, box, or chair. Your body hangs horizontally. Your arms are fully extended. Your core stays braced. Your scapulae are protracted at the bottom.
Plant your feet firmly on the elevated surface. Your knees stay straight. Your body forms a rigid plank from shoulders to heels. Your neck stays neutral. Your chest points toward the bar. Your glutes and hamstrings contract to maintain the plank position. No sagging hips.
Initiate the pull by retracting your shoulder blades. Drive your elbows toward the floor. Your lats and rhomboids fire together. Pull your chest to the bar. Your body moves as one unit. Your core stays locked. Your hips do not sag. Your spine stays neutral.
Finish the rep with shoulder blades drawn together. Your chest touches the bar. Your ribs stay close to the bar. Your scapulae are fully retracted. Hold the contraction for a brief second. Feel your back muscles engage. Your elbows are fully bent at your sides.
Control the eccentric phase back to the start. Lower your body slowly. Resist gravity’s pull. Your lats and rhomboids work eccentrically to control the descent. Your shoulder blades protract at the bottom. Your arms fully extend. This is where the real strength is built.
Complete 8-12 reps per set. The elevated feet position increases the difficulty. You are pulling a higher percentage of your bodyweight. Start with 3 sets. Progress to 4-5 sets. Focus on form and control over reps. Quality beats quantity.
Expert Analogy: “Think of the inverted row like pulling a heavy sled backward. You don’t jerk it. You engage your lats. You drive your elbows. You control the tension. That’s how you build a back that actually looks like you lift.”
Muscles Worked: Primary and Secondary Contributors
Latissimus dorsi handles the primary pulling force. The lats are the largest back muscles. They originate on the thoracic and lumbar spine. They insert on the humerus. Their job is shoulder extension and adduction. The inverted row maximizes their activation through horizontal pulling.
Rhomboids and trapezius control scapular retraction. The rhomboids pull the shoulder blades together. The middle trapezius assists. Your scapulae move through full range of motion. From full protraction to full retraction. This builds postural strength and prevents rounded shoulders. See our back exercises for more.
Posterior deltoid assists with shoulder extension. The posterior deltoid contributes to pulling strength. It works alongside the lats. Your rear delts provide power while the lats provide mass. This combination builds thickness and width in your upper back. For more shoulder work, see our shoulder exercises.
Core stabilizers prevent spinal extension. The rectus abdominis, obliques, and transversus abdominis work isometrically. Your core must maintain a rigid plank. This prevents hyperextension in your lower back. Your glutes and hamstrings assist with pelvic stability. This is a full-body exercise disguised as a back movement. See our core exercises for complementary work.
Quoting a strength coach: “The inverted row with feet elevated is the horizontal pull you’re probably neglecting. It builds lat width, rhomboid thickness, and core rigidity. You can’t cheat it. You can’t bounce it. You earn every rep.”
Who It’s For
Athletes needing horizontal pulling strength. Rowers benefit. Swimmers benefit. Climbers benefit. Football players benefit. The movement pattern mimics pulling and rowing demands. Your back needs horizontal pulling to balance vertical pulling. This exercise fills that gap. See our performance hub for more.
Lifters who can’t do pull-ups yet. The inverted row is a scalable progression. Feet on the floor is easier. Feet elevated is harder. You build the strength needed for pull-ups. Your lats and rhomboids strengthen. Your grip improves. Your pull-up potential increases. See our pull-up guide for progression.
Anyone wanting to improve posture. Most people have weak rhomboids. Their shoulders round forward. This exercise directly addresses that. Scapular retraction builds the muscles that pull your shoulders back. Improved posture means less neck pain. Less shoulder pain. A better silhouette.
Bodybuilders wanting back thickness and width. The inverted row builds lat width and rhomboid thickness. The horizontal pull complements vertical pulls like pull-ups and pulldowns. This creates a more complete back development. A wider back looks better and performs better.
Who It’s Not For
Anyone with active shoulder impingement. This exercise requires full scapular protraction and retraction. This can aggravate impingement. Consult a professional first. We are not testing. We are analyzing mechanics. This movement is not for acute shoulder issues.
Lifters with acute lower back pain. The elevated feet position creates more core demand. Your spine must stay neutral. If you have back pain, start with feet on the floor. Reduce the lever arm. Progress slowly. See our joint stability guide.
Complete beginners with no horizontal pulling experience. Start with feet on the floor. Master the movement pattern. Build foundational strength. Then elevate your feet. Jumping to the elevated version too quickly leads to form breakdown. Build up progressively. See our bodyweight exercise guide.
Programming the Inverted Row With Feet Elevated
Strength Day: 4 sets of 6-8 reps. This is a strength and hypertrophy builder. Use a controlled tempo. Focus on full range of motion. Rest 90-120 seconds between sets. Pair with vertical pulling work. See our pull-up guide.
Volume Day: 3 sets of 12-15 reps. Use a faster tempo. Focus on endurance and work capacity. Your back muscles get a metabolic burn. Great for muscle growth. Rest 60-90 seconds between sets.
Finisher: 2 sets to failure. Push your limits. Use this at the end of your back workout. Your lats and rhomboids are pre-fatigued. This builds mental toughness and muscular endurance. Only for advanced lifters.
Frequency considerations: Use this exercise 1-2 times weekly. Your back recovers quickly. But the core demand creates systemic fatigue. Monitor your recovery. For more on recovery, see our muscle recovery hub.
Common Mistakes to Avoid
Hips sagging during the pull. Your body must stay rigid. Sagging hips reduce lat activation. Your lower back takes the stress. Brace your core. Squeeze your glutes. Maintain a straight line from shoulders to heels. Your plank position is essential.
Using momentum to jerk the body up. The inverted row is a controlled movement. Momentum reduces muscle tension. Your lats and rhomboids get less work. Pull smoothly. Lower slowly. Control is everything.
Partial range of motion. Your chest must touch the bar. Your shoulder blades must fully retract. Partial reps miss the end-range stimulus. This is where the rhomboids work hardest. Shortening the range reduces effectiveness.
Chin tucked or jutting forward. Your neck stays neutral. Tucking your chin reduces scapular mobility. Jutting it forward creates neck strain. Your spine forms a straight line. Your head stays in that line. No neck flexion. No neck extension.
Feet too high or too low. The elevated position should be challenging but not impossible. Start with a 12-18 inch elevation. Increase height as you get stronger. The higher your feet, the harder the movement. Your bodyweight percentage increases.
Expert Comparison: “Treat the inverted row like a bench press for your back. You wouldn’t bounce the bar off your chest. You’d control it down. Control it up. Same principle here. Control beats chaos.”
Variations to Progress or Regress
Feet on Floor Regression: Keep your feet planted on the ground. Your body is at an angle. This reduces the lever arm and difficulty. Great for beginners. Build foundational strength. Master the movement. Then elevate your feet. See our inverted rows guide.
Single-Arm Inverted Row Variation: Hold the bar with one hand. Your other hand grabs your wrist or rests on your hip. This increases unilateral demand. Exposes strength asymmetries. Advanced movement. Master the bilateral version first.
L-Sit Inverted Row Variation: Keep your legs straight and parallel to the floor. Your hips are at 90 degrees. This adds core demand. Your abs work harder to maintain the L-position. Great for advanced lifters. See our core exercises.
Weighted Inverted Row Progression: Add a weight vest or place a plate on your hips. This increases the load. Your lats and rhomboids work harder. Progress only after mastering bodyweight. See our progressive overload guide.
Ring Inverted Row Variation: Use gymnastic rings instead of a bar. This adds instability. Your stabilizers work harder. Your rotator cuff and scapular stabilizers get extra work. Advanced variation. See our ring rows guide.
Inverted Row With Feet Elevated – FAQ
A: It is a different movement. The inverted row is a horizontal pull. The pull-up is a vertical pull. The elevated feet position increases the percentage of your bodyweight you pull. For many, it is comparable in difficulty to a pull-up. See our pull-up guide for comparison.
A: A sturdy bar at waist height. A squat rack, Smith machine, or barbell in a rack works. A low table or sturdy counter works for beginners. An elevated surface for your feet. A bench, box, or sturdy chair.
A: Start with a 12-18 inch elevation. A standard bench height works well. Increase elevation as you get stronger. Higher feet = harder movement. Your body becomes more horizontal. You pull more bodyweight.
A: Use caution. The inverted row requires full scapular mobility. If you have impingement or pain, consult a professional. Start with feet on the floor. Reduce the lever arm. Progress slowly. See our joint stability guide.
A: The inverted row uses bodyweight resistance. Barbell rows use external load. Both build back strength. The inverted row requires more core stability. The barbell row allows heavier loading. Use both for complete back development.
Final Verdict
The inverted row with feet elevated is a precision horizontal pulling tool. The latissimus dorsi activation. The rhomboid engagement. The core stabilization. This variation builds back strength and postural resilience. It improves shoulder health. It builds a wider back. It’s not the most impressive exercise. It’s effective.
The elevated feet position increases the difficulty. You pull more of your bodyweight. The lever arm is longer. Your back works harder. This is the progression from the standard inverted row. This is the stepping stone to pull-ups.
Your back needs horizontal pulling. Most people overemphasize vertical pulling. Pull-ups and pulldowns dominate. The inverted row balances your pulling work. This prevents imbalances. This reduces injury risk. This builds a complete back.
Your form determines your results. Full range of motion. Scapular retraction. Core rigidity. Controlled eccentric. Do these things consistently. Your back strength and posture will improve. Your pull-up potential will increase. Your back will thank you.
Build a Stronger, Wider Back
The inverted row with feet elevated is your ticket to horizontal pulling strength and postural improvement. Use it consistently. Progress slowly. Watch your back width and strength improve. For more back exercises and programming, explore our comprehensive guides.
Key Terms for This Back Exercise
- Horizontal Pull
- A pulling movement where resistance is pulled toward the torso horizontally. The inverted row is a horizontal pull. Balances vertical pulling work.
- Scapular Retraction
- Movement of the shoulder blades toward each other and the spine. Controlled by the rhomboids and middle trapezius. Essential for pulling strength.
- Scapular Protraction
- Movement of the shoulder blades away from each other. Controlled by the serratus anterior. Full protraction at the bottom of the inverted row.
- Lever Arm
- The distance between the fulcrum and the load. In the inverted row, elevating the feet increases the lever arm. This makes the exercise harder.
- Moment Arm
- The perpendicular distance from the joint to the line of force. The elevated feet position creates a longer moment arm. Requires more force to pull.
- Core Rigidity
- Maintaining a braced, stable torso during movement. Essential for the inverted row. Prevents hip sag and lower back hyperextension.